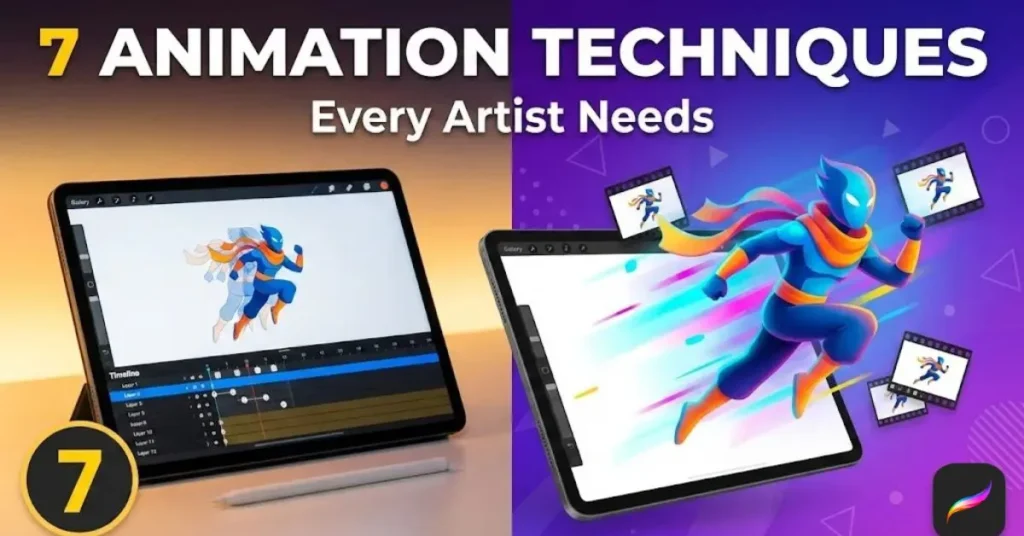
You’ve spent hours perfecting that illustration on your iPad, and suddenly you think: What if it could move? That flutter of excitement mixed with “how do I even start?” is exactly where every animator begins. The good news? Your Procreate app isn’t just for creating stunning still art—it’s a powerful animation studio hiding in plain sight.
Whether you’re dreaming of bringing your characters to life, creating eye-catching social media loops, or adding animation skills to your freelance portfolio, you’re in the right place. Today, we’re diving into seven essential Procreate animation techniques that will transform your static drawings into dynamic, moving artwork. No expensive software required—just your iPad, your creativity, and a willingness to experiment.
Let’s turn those frames into magic.
Table of Contents
Understanding Procreate Animation Basics
Before you jump into creating the next viral animation loop, you need to understand what makes Procreate’s animation tools special. Unlike complex desktop software that requires weeks of tutorials, Procreate’s Animation Assist feature feels intuitive from day one.
What Makes Procreate Animation Special?
Animation Assist transforms your familiar Procreate interface into a frame-by-frame animation studio. You’ll find everything you need—onion skinning, playback controls, and layer management—without the overwhelming learning curve of traditional animation software. The best part? Your illustration workflow stays exactly the same. You’re simply adding movement to the art style you’ve already mastered.
Think of it this way: if you can draw in Procreate, you can animate in Procreate.
Choosing the Right iPad for Procreate Animation
Here’s the honest truth about hardware—not all iPads handle animation equally. Your device’s RAM determines how many layers you can animate smoothly, which directly impacts the complexity of projects you can tackle.
For beginners on a budget: The iPad 10th Generation ($350-$500) lets you experiment with simple 2-4 layer animations. Perfect for learning the basics without breaking the bank.
For serious animators: The iPad Air with M1 or M2 chip ($600-$800) offers the sweet spot. With 8GB RAM, you’ll smoothly animate 10-15 layers—enough for character animation with backgrounds and effects.
For professionals: The iPad Pro 12.9″ ($1,000+) with 16GB RAM handles 30+ animation layers. If you’re creating client work or complex scenes, this is your tool.
The key features to prioritize? RAM above all else (minimum 8GB for smooth animation), storage space for video exports (256GB recommended), and Apple Pencil Gen 2 for precision. That 120Hz ProMotion display on higher-end models makes a noticeable difference when previewing your animations too.
Essential Procreate Animation Settings & Setup
Let’s get your canvas ready for animation magic. Open Procreate and tap Actions (that wrench icon) > Canvas > Animation Assist. Boom—you’re in animation mode.
Now, set your frames per second (FPS). Start with 12fps for that classic hand-drawn animation feel. It’s forgiving for beginners and creates smooth movement without requiring excessive frames. Working on something more cinematic? Bump it to 24fps. Social media loops? Try 30fps for buttery-smooth playback.
The onion skin feature is your secret weapon. Enable it and adjust to show 2-3 frames before and after your current frame. This ghosted preview lets you see how your drawings flow together—essential for maintaining consistent movement and proportions.
Best Procreate Brushes for Animation
Your brush choice dramatically affects your animation quality and workflow speed. Here’s what belongs in every animator’s toolkit:
For clean line work:
- Technical Pen (built-in): Crisp, consistent strokes that look identical across frames
- Monoline: Perfect for character outlines with uniform line weight
- Studio Pen: Smooth precision for detailed animation work
For painting and color:
- Round Brush: Your versatile workhorse for fills and soft edges
- Gouache: Adds beautiful texture to painted animation styles
- Flat Brush: Ideal for blocking in colors quickly across multiple frames
For special effects:
- Soft Airbrush: Creates dreamy motion blur effects
- Light Pen: Glow effects for magical animations
- Noise Brushes: Adds atmospheric grain and texture
Pro tip: Consistency is everything in animation. Choose one brush for your main line work and stick with it throughout the project. Switching brushes mid-animation creates jarring visual inconsistencies that scream “amateur.”
Technique #1: Frame-by-Frame Animation Fundamentals
Every animation journey starts here—the bouncing ball. Before you roll your eyes, understand that this simple exercise teaches you timing, spacing, and the physics that make movement feel believable.
Create a new canvas (1080x1080px works great for social media), set Animation Assist to 12fps, and draw your ball at the top of the screen on frame 1. On frame 6, draw it at the bottom—squashed from impact. On frame 12, it’s back at the top, ready to loop.
Now fill in those in-between frames using onion skin as your guide. Notice how the ball accelerates downward and decelerates upward? That’s gravity in action. The squash at the bottom and slight stretch during fall? That’s the principle that makes animation feel alive rather than robotic.
This exercise builds muscle memory for reading movement and understanding how objects interact with forces. Master this, and character animation becomes infinitely easier.
Technique #2: Character Animation & Walk Cycles
Ready to bring your characters to life? Walk cycles are the foundation of character animation—and they’re less intimidating than they look.
Break down a walk into eight key poses: contact, down, passing, up, contact, down, passing, up. Your character’s foot makes contact with the ground, their body lowers as they transfer weight, they pass through the middle position, rise up, and repeat with the opposite foot.
Here’s the workflow secret professionals use: animate each body part on separate layers. Head on one layer, torso on another, legs and arms on their own layers. This lets you adjust timing independently—maybe the head bobs slightly behind the body movement for a more natural, loose feel.
Use reference video. Seriously. Record yourself walking or find reference footage online at Animator’s Resource. Study how shoulders and hips rotate opposite each other, how arms swing naturally, how the body bounces subtly with each step. These tiny details separate acceptable animation from exceptional animation.
Your character doesn’t need to be complex. Even a simple stick figure teaches you the mechanics. Once you understand the movement, adding detail becomes straightforward.
Technique #3: Morphing & Shape Transformation Effects
Want to create those mesmerizing transitions where one shape seamlessly becomes another? This technique opens up incredible creative possibilities—logo reveals, visual metaphors, abstract art that flows like water.
Start with your initial shape on frame 1. Draw your final shape on frame 20. Now comes the fun part: create 18 in-between frames showing the gradual transformation. Use Procreate’s liquify tool between frames to create organic, flowing morphs that feel magical rather than mechanical.
The key to smooth morphing? Maintain consistent anchor points. If your starting shape has a corner in the top-right, your ending shape should too—even if everything else changes. This gives your animation a thread of continuity that guides the viewer’s eye.
Add subtle motion blur using a soft brush on a separate layer, lowering the opacity to 30-40%. This polish transforms a good morph into a professional-looking effect that could live in a commercial or music video.
Technique #4: Looping Animations & GIFs for Social Media
Here’s where Procreate animation becomes a powerful marketing tool. Looping animations captivate scrollers, boost engagement, and showcase your skills in seconds.
The secret to perfect loops? Your first frame must match your last frame exactly. Duplicate your starting frame at the end, then delete it—this ensures seamless looping when your animation plays on repeat.
Popular loop ideas that perform well:
- Floating objects with subtle up-and-down movement
- Rotating logos or icons
- Ambient backgrounds (gently flowing water, drifting clouds, flickering flames)
- Cinemagraphs where one element moves while everything else stays still
For Instagram, export at 1080x1080px as an MP4 file—it maintains quality better than GIF. For Twitter and email, GIF format works beautifully despite the larger file size.
Timing matters tremendously. A 2-3 second loop (24-36 frames at 12fps) feels dynamic without being exhausting. Shorter loops can feel frantic, longer loops lose impact as viewers scroll past.
Technique #5: Text Animation & Kinetic Typography
Text doesn’t have to sit still. Animated typography grabs attention and communicates emotion through movement—excitement bounces, sadness drips, energy explodes.
The handwriting effect remains timelessly popular. Write your text normally, then on each new frame, add more strokes using Alpha Lock. Frame 1 shows just the first letter’s first stroke, frame 2 adds the second stroke, and so on. It looks like invisible hands are writing in real-time.
For individual letter animations, separate each character onto its own layer. Now you can animate them independently—letters can bounce in one by one, scale up from nothing, or tumble into place with rotation.
Pro typography tip: Use Procreate’s text tool for consistency, but hand-letter when you want organic character. Custom lettering brushes give your text animation personality that generic fonts can’t match. The built-in Monoline brush creates beautifully consistent letters perfect for animation.
Want to level up? Add secondary animation—small movements that happen after the main action. Your letter lands, then overshoots slightly before settling. That tiny bounce makes everything feel more alive and physically believable.
Technique #6: Layer Animation & Camera Movement Illusions
Creating depth in 2D animation feels like magic, but it’s simpler than you think. The parallax effect—where different layers move at different speeds—tricks the eye into perceiving depth.
Set up your scene with three layers: background (sky), midground (mountains or buildings), and foreground (trees or grass). When you animate a horizontal pan, move your background layer slowly, midground layer at medium speed, and foreground layer quickly. Suddenly, your flat drawing has dimensional space.
This technique works beautifully for:
- Side-scrolling game animations
- Establishing shots for animated stories
- Dynamic social media backgrounds
- Opening sequences for video content
Performance tip: iPads with 8GB RAM can typically handle 3-5 parallax layers smoothly. If you’re on an older device, reduce canvas resolution or combine layers using clipping masks to maintain performance.
Simulate camera zoom by scaling all layers simultaneously using the Transform tool. Rotate everything together for dynamic spinning effects. Combine movements—zoom while panning, or rotate while parallaxing—for cinematic results that rival professional animation software.
Technique #7: Advanced Effects—Motion Blur, Smears & Speed Lines
Professional animation polish comes from understanding when to break the rules. Motion blur, smear frames, and speed lines communicate speed and impact in ways realistic movement can’t.
Motion blur happens naturally when objects move fast—your eye can’t track them sharply. In animation, add this artificially by duplicating your moving element, applying Gaussian blur, and lowering opacity to 40-50%. It sells speed instantly.
Smear frames are those wonderfully distorted drawings that appear for just one frame during fast action. Your character’s arm becomes an elongated blur mid-swing, or their face stretches during a head turn. These “incorrect” drawings create fluid motion that feels more dynamic than anatomically accurate frames.
Speed lines are the classic manga technique for showing movement. Create a custom speed line brush (or download free speed line brush packs from sites like Gumroad) and draw radiating lines behind your moving subject. Use them sparingly—they lose impact if overused.
The art of these effects lies in subtlety and timing. One smear frame between two normal frames works; five smear frames looks sloppy. Light motion blur enhances movement; heavy blur makes everything muddy.
Optimizing Your Procreate Animation Workflow
Speed matters when you’re animating. Here’s how pros work smarter, not harder:
Organization is everything. Name your layers descriptively—”Frame_01_Ball,” “Frame_02_Ball,” not “Layer 1,” “Layer 23.” Color-code related frames using layer color tags. Future you will be grateful when editing complex animations at 2 AM.
Use QuickMenu. Customize it with your most-used animation tools: Clear, Duplicate, Transform, Alpha Lock. Tap once instead of digging through menus repeatedly—your productivity skyrockets.
Duplicate strategically. Animation involves lots of similar frames with small changes. Duplicate previous frames rather than redrawing from scratch. Use Transform to reposition elements slightly between frames—it’s faster and maintains consistency.
Lower your canvas resolution when experimenting. Testing animation timing at 2048x2048px wastes processing power. Work at 1024x1024px while animating, then recreate at full resolution once you’ve nailed the timing.
Common issues and fixes:
- Laggy playback? Reduce layer count, merge non-animating layers, or lower canvas size
- Export taking forever? Choose MP4 over GIF for faster processing and smaller files
- Animation looks jittery? Add more in-between frames or enable frame blending in Animation Assist
- Can’t preview smoothly? Close other apps, restart Procreate, or reduce FPS temporarily
Free Resources to Accelerate Your Animation Journey
Let’s be real—great tools shouldn’t break the bank. While premium animation brush packs exist (and many are worth the investment), you can create professional animations using free resources.
Start with Procreate’s built-in brushes—they’re incredibly capable. The Technical Pen, Studio Pen, and Monoline brushes handle 90% of animation line work beautifully. The built-in airbruses create lovely motion blur effects.
For free brush expansions, explore trusted creator communities. Many professional illustrators share free animation brush sets on Gumroad and Instagram—just search hashtags like #ProcreateBrushes or #FreeProcreateBrushes.
Practice exercises to build skills:
- Bouncing ball (master timing and spacing)
- Waving flag (understand flowing movement)
- Blinking character (practice held frames and anticipation)
- Morphing shapes (develop transformation skills)
- Simple walk cycle (the ultimate character animation test)
Download animation canvas templates at common export sizes (1080×1080, 1920×1080, 1080×1920) so you’re always working in the correct dimensions for your target platform.
Taking Your Animation Further
Procreate animation isn’t an isolated skill—it’s a gateway to bigger opportunities. Export your animations as transparent MP4 files and bring them into Adobe After Effects for compositing with live action footage. Use LumaFusion directly on your iPad to edit multiple animations into longer video projects.
Your animation skills make you more valuable to clients. Brands constantly need animated social media content, short explainer animations, and eye-catching ads. Even simple looping animations command $200-$500 per project from businesses without in-house designers.
Build a portfolio showcasing your range—character animation, logo reveals, kinetic typography, and ambient loops. Post consistently on Instagram and TikTok using relevant hashtags. The Procreate animation community actively supports fellow artists and shares work, creating opportunities for collaboration and client discovery.
Price your services confidently. A 5-second looping animation might take you 3-4 hours including revisions—that’s specialized skill worth fair compensation. Start at $150-$300 for simple loops and scale up as your portfolio grows.
Bring Your Art to Life Starting Today
You’ve got seven powerful techniques, hardware recommendations, brush suggestions, and workflow tips. Everything you need to start animating exists right here. The only missing ingredient? You actually trying it.
Start small. Don’t attempt a 60-second animated short as your first project. Create a simple 2-second loop—maybe a floating icon or a blinking character. Feel the satisfaction of seeing your drawing move for the first time. That feeling fuels every frame you’ll create going forward.
Animation looks intimidating from the outside, but it’s just drawing—over and over, with tiny changes. You already know how to draw. Now you’re simply adding the dimension of time.
Your iPad is waiting. Your stylus is charged. Your creativity is ready. Open Procreate, enable Animation Assist, and create your first frame. The animation journey starts with a single drawing—then another, and another, until suddenly it’s moving and you’re hooked.
The art world is watching. Show them what you can create when your illustrations break free from stillness.
Frequently Asked Questions About Procreate Animation
How do I start animating in Procreate?
Enable Animation Assist by tapping Actions > Canvas > Animation Assist. Set your FPS (start with 12fps), then create your animation frame by frame using separate layers. Each layer becomes one frame. Use onion skin to preview previous frames while drawing.
What’s the best iPad for Procreate animation?
The iPad Air (M1 or M2) with 8GB RAM offers the best value, smoothly handling 10-15 animation layers. Professionals should consider the iPad Pro 12.9″ with 16GB RAM for complex 30+ layer projects. Beginners can start with iPad 10th Gen but expect limitations.
Can I create professional animations in Procreate?
Absolutely. Procreate’s Animation Assist is powerful enough for client work, social media content, and portfolio pieces. Many professional animators use it for frame-by-frame animation, especially looping GIFs and short sequences. The quality depends on your skill, not the software.
What are the best Procreate brushes for animation?
Use Technical Pen or Monoline for consistent line work, Round Brush for versatile painting, and specialized motion blur brushes for effects. Consistency matters more than having dozens of brushes—pick one for line work and stick with it throughout your project.
How many frames do I need for smooth animation?
At 12fps (standard for hand-drawn animation), you’ll need 12 frames per second of movement. A 2-second animation requires 24 frames. Simple loops work with 8-16 frames, while complex character animation might need 30-60+ frames depending on the action.
How do I export Procreate animations?
Tap Actions > Share > Animated MP4 (better quality, smaller file size) or Animated GIF (universal compatibility). Choose MP4 for Instagram, TikTok, and YouTube. Export at 1080x1080px for Instagram posts or 1920x1080px for widescreen content.
Why is my Procreate animation lagging?
Your iPad’s RAM is overwhelmed. Solutions: reduce canvas size, limit animation layers (10-15 max for 8GB RAM iPads), merge non-animating background layers, or lower FPS temporarily. The iPad Pro with more RAM handles larger projects better.
How long does it take to learn Procreate animation?
Basic skills develop in 1-2 weeks with daily practice. Start with simple exercises like bouncing balls. Intermediate techniques (character animation, morphing) take 1-3 months. Professional mastery requires 6-12 months of consistent practice and experimentation.
Ready to transform your art into motion? Download our free Procreate Animation Starter Kit including custom brushes, canvas templates, and practice exercises. Join 15,000+ digital artists receiving weekly animation tips and exclusive brush releases—drop your email below and level up your creative game today.