In 2025, Procreate remains the gold‑standard iPad app for illustrators, graphic designers, and hobbyists alike. Yet one question still trips up many newcomers: how to install Procreate brushes you’ve just downloaded. This beginner‑friendly guide walks you through every method—step by step—with helpful screenshots so you can start drawing in minutes.
Table of Contents
What You’ll Need
| Requirement | Minimum Version | Why It Matters |
|---|---|---|
| iPad & Apple Pencil | iPadOS 16 or later | Ensures brush textures render correctly |
| Procreate App | v5.3 or later (v6 recommended) | Brush engine improvements & brush folders |
| Brush File | .brush or .brushset | Single brush vs bundle |
Pro Tip: Always verify the creator’s usage license. Most free sets allow personal projects; some permit commercial use.
Method 1 – Install via Files App (Fastest)
This is the most common workflow when you download a brush set from Safari, Gumroad, or FreeProcreateBrushes.org.
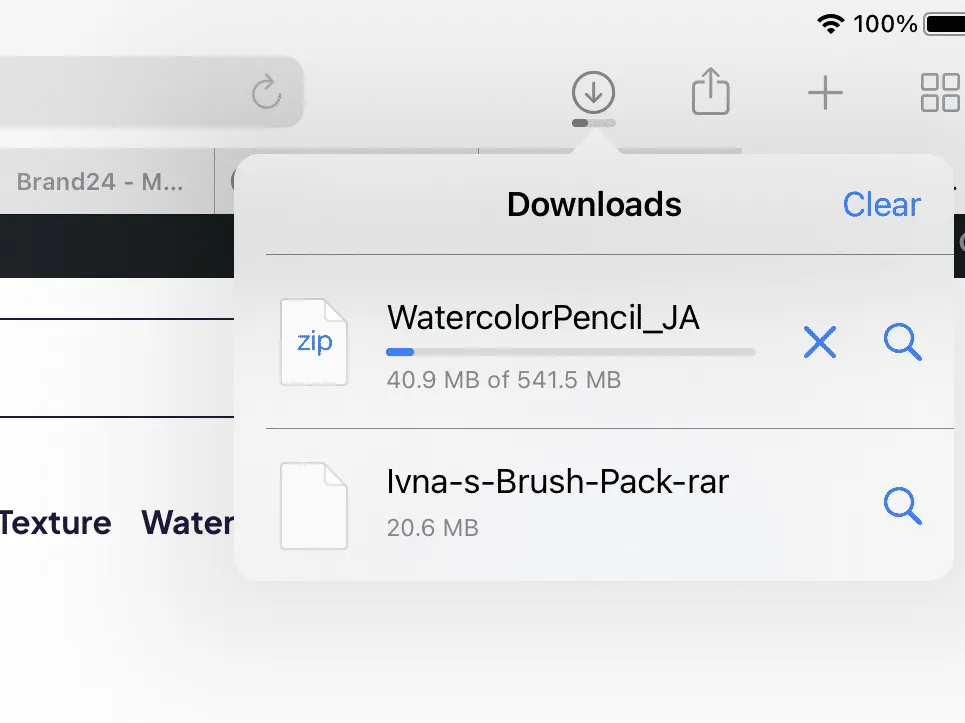
1.Download the brush file.
Your browser will show a blue down‑arrow icon. Tap it, then Downloads to reveal the file in Files App.
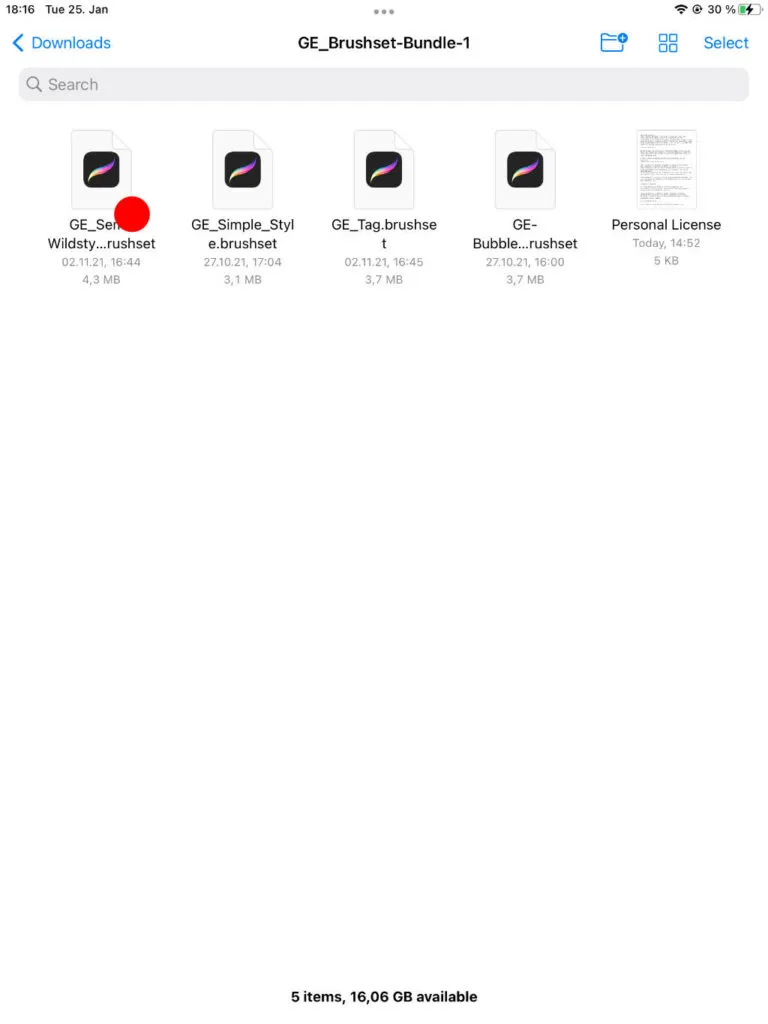
2.Locate the file in Files App.
It usually sits inside On My iPad › Downloads unless you changed the path.
3.Tap the file once.
iPadOS hands the file to Procreate automatically, launches the app, and displays “Importing…” at the top.
4.Find your brushes under Imported.
Open the Brush Library (📚 icon). Scroll to the top—Procreate creates a new folder named after the file or “Imported”.
That’s it! You can now select any brush from the new set and start creating.
Method 2 – Import Directly Inside Procreate
Ideal if your brushes live in iCloud Drive, Google Drive, or Dropbox and you don’t want to leave the app.
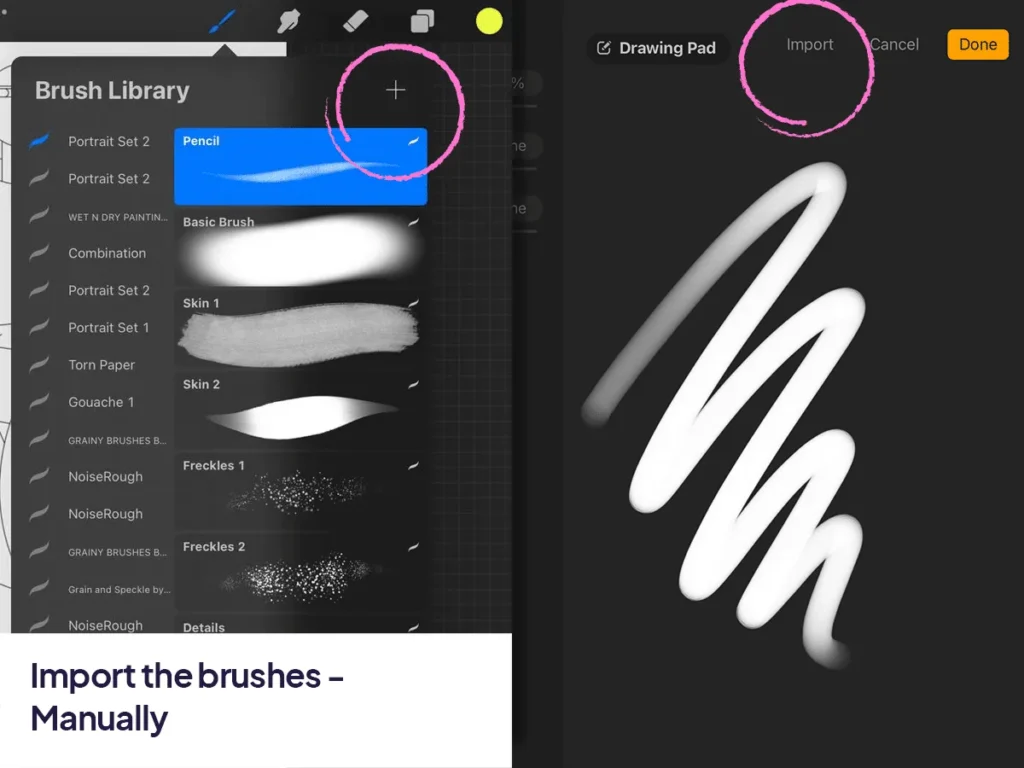
- Open any Procreate canvas. Tap the Brush Library icon.
- Tap the “+” (Add) button at the top‑right of the Brush Library.
- Choose Import from the context menu.
- Navigate to your storage location in the Files dialogue that appears. Select the
.brushset(bundle) or.brush(single) file. - Procreate imports the brushes instantly under a folder with the same name.
Why use this method? It lets you import multiple sets without cluttering your iPad’s local Downloads folder.
Method 3 – Drag & Drop from Split View
For power users who love multitasking on iPad.
- Open Procreate and swipe up from the bottom to reveal the dock.
- Drag the Files App icon to the left or right edge to activate Split View.
- Locate your brush file in Files and drag it directly onto the Procreate canvas.
- Procreate will flash “Importing…” and place the brushes in the Imported folder.
Nice touch: This works for single brushes too—great for testing one‑offs without breaking focus.
Troubleshooting FAQ
“Unsupported file type” error
• Ensure the file ends in .brush or .brushset.
• If it’s a ZIP, first tap to uncompress in Files.
Brushes not showing up
• You may be in the wrong Brush Library section. Scroll to the very top—Imported is sorted alphabetically.
• Restart Procreate to refresh the library.
File won’t download from Google Drive
• Sign in via Safari, then tap the Download ↧ icon. Google sometimes blocks direct downloads if you’re not logged in.
Bonus Tips
- Rename your brush sets. Tap the set name › Rename to stay organised.
- Create brush folders by style. E.g. Sketching, Lettering, Textures.
- Back up regularly. Swipe left on a brush set › Share › iCloud Drive.
- Sync across iPads. Backups let you AirDrop sets to a second device.
Final Thoughts
Learning how to install Procreate brushes is the first step toward unlocking endless creativity. With these methods, you can import any brush—paid or free—in seconds and focus on what matters: making art.
Next up: Grab our curated list of 50+ Free Procreate Brushes and practice installing a few today.